Terraform
[ Terraform101 Study - 5w ]Terraform Runner
su''@
2024. 7. 13. 23:39
Terrafrom T101 4기 실습 스터디 게시글입니다.
"테라폼으로 시작하는 IaC" 도서를 참고하여 정리했습니다.
더보기
Atlantis
소개 : Terraform Pull Request Automation - Running Terraform Workflows with Ease - Link Github Blog


https://techblog.pet-friends.co.kr/펫프렌즈가-devops-조직없이-인프라를-관리하는-방법-ce27449bc201
https://blog.amis.com/infrastructure-as-code-day-2-collaboration-242bd82a102c
Infrastructure As Code Day 2 — Collaboration
雲端架構即程式碼: 協同合作
blog.amis.com
실습
- AWS EC2 생성 : atlantis 서버 역할
# CloudFormation yaml 파일 다운로드 : 위 노션 파일 클릭 후 다운 로드

# CloudFormation 스택 배포
MYKEYNAME=<각자 자신의 AWS EC2 서울 리전 Keypair 이름>
MYKEYNAME=kp-gasida
aws cloudformation deploy --template-file t101-atlantis-ec2.yaml --stack-name t101 --parameter-overrides KeyName=$MYKEYNAME SgIngressSshCidr=$(curl -s ipinfo.io/ip)/32 --region ap-northeast-2

# [모니터링] CloudFormation 스택 상태
while true; do
  date
  AWS_PAGER="" aws cloudformation list-stacks \
    --stack-status-filter CREATE_IN_PROGRESS CREATE_COMPLETE CREATE_FAILED DELETE_IN_PROGRESS DELETE_FAILED \
    --query "StackSummaries[*].{StackName:StackName, StackStatus:StackStatus}" \
    --output table
  sleep 1
done

# EC2 공인 IP 확인
aws cloudformation describe-stacks --stack-name t101 --query 'Stacks[*].Outputs[0].OutputValue' --output text
- AWS EC2 SSH 접속 : 기본 정보 확인
# ubuntu EC2에 SSH 접속
ssh -i ~/.ssh/kp-gasida.pem ubuntu@$(aws cloudformation describe-stacks --stack-name t101 --query 'Stacks[*].Outputs[0].OutputValue' --output text)
---------------------------
# 계정 확인
whoami

# aws 자격증명 설정 : (옵션) IAM profile로 설정 -> 단 이경우 tf 파일에 설정 필요
aws --version
aws configure
AWS Access Key ID [None]: ####
AWS Secret Access Key [None]: ####
Default region name [None]: ap-northeast-2
Default output format [None]:

# aws 자격증명 확인
aws s3 ls

# 테라폼 버전 확인
terraform version

#
git version

#
ls -l
./atlantis version
- 공인 IP 혹은 도메인 노출 설정
Atlantis needs to be accessible somewhere that github.com/gitlab.com/bitbucket.org or your GitHub/GitLab Enterprise installation can reach.
One way to accomplish this is with ngrok, a tool that forwards your local port to a random public hostname.
# URL 변수 지정
URL="http://$(curl -s ipinfo.io/ip):4141"
echo $URL- Git Repo (Private) 생성

- Git Token 생성 - Docs
- Github → Settings → Developer settings ⇒ Personal access tokens : Tokens (classic) ← Repo 제한 가능 Fine-grained tokens 사용 권장

- Github → Settings → Developer settings ⇒ Personal access tokens : Tokens (classic) ← Repo 제한 가능 Fine-grained tokens 사용 권장
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
- Create an access token for Atlantis
We recommend using a dedicated CI user or creating a new user named @atlantis that performs all API actions, however for testing, you can use your own user.
Here we'll create the access token that Atlantis uses to comment on the pull request and set commit statuses. - GitHub or GitHub Enterprise Access Token
- Create a Personal Access Token
- create a token with repo scope
- set the token as an environment variable
TOKEN="{YOUR_TOKEN}"
- [권장] Create a webhook secret so Atlantis can validate webhooks - See Creating a Webhook Secre
Atlantis uses Webhook secrets to validate that the webhooks it receives from your Git host are legitimate.Webhook secrets are actually optional. However they're highly recommended for security.
One way to confirm this would be to allowlist requests to only come from the IPs of your Git host but an easier way is to use a Webhook Secret. - Generating A Webhook Secret
You can use any random string generator to create your Webhook secret. It should be > 24 characters..
For example:- Generate via Ruby with ruby -rsecurerandom -e 'puts SecureRandom.hex(32)'
- Generate online with browserling: Generate Random Strings and Numbers

pvktwqgrglrwxvcscjlrnyqm[NOTE] You must use the same webhook secret for each repo.
Create a Webhook Secret
- GitHub and GitLab use webhook secrets so clients can verify that the webhooks came from them.
# Create a random string of any length (you can use random.org) and set an environment variable:
SECRET="{YOUR_RANDOM_STRING}"
Add Webhook
- Take the URL that ngrok output and create a webhook in your GitHub, GitLab or Bitbucket repo:
GitHub or GitHub Enterprise Webhook
- Go to your repo's settings
- Select Webhooks or Hooks in the sidebar
- Click Add webhook
- set Payload URL to your ngrok url with /events at the end. Ex. http://**<EC2공인IP>:4141**/events
- double-check you added /events to the end of your URL.
- set Content type to application/json
- set Secret to your random string
- select Let me select individual events
- check the boxes
- Issue comments
- Pull request reviews
- Pushes
- Pull requests
- leave Active checked
- click Add webhook

- Start Atlantis
You're almost ready to start Atlantis, just set two more variables:
USERNAME="{the username of your GitHub, GitLab or Bitbucket user}"
REPO_ALLOWLIST="$YOUR_GIT_HOST/$YOUR_USERNAME/$YOUR_REPO"
REPO_ALLOWLIST="github.com/gasida/t101-cicd"
# ex. REPO_ALLOWLIST="github.com/runatlantis/atlantis"
# If you're using Bitbucket Server, $YOUR_GIT_HOST will be the domain name of your
# server without scheme or port and $YOUR_USERNAME will be the name of the **project** the repo
# is under, **not the key** of the project.
Now you can start Atlantis. The exact command differs depending on your Git host:
#
URL="http://$(curl -s ipinfo.io/ip):4141"
USERNAME=gasida
TOKEN='###'
SECRET='###'
REPO_ALLOWLIST="github.com/gasida/t101-cicd"

# 변수 설정 확인
echo $URL $USERNAME $TOKEN $SECRET $REPO_ALLOWLIST

# Atlantis 서버 실행
./atlantis server \
--atlantis-url="$URL" \
--gh-user="$USERNAME" \
--gh-token="$TOKEN" \
--gh-webhook-secret="$SECRET" \
--repo-allowlist="$REPO_ALLOWLIST"

# [신규 터미널] 기본 tcp 4141 포트 오픈
ss -tnlp
State      Recv-Q     Send-Q         Local Address:Port         Peer Address:Port    Process
LISTEN     0          4096                       *:4141                    *:*        users:(("atlantis",pid=2089,fd=7))
...

# 웹 접속 확인
URL="http://$(curl -s ipinfo.io/ip):4141"
echo $URL
http://3.38.213.238:4141
- (참고) git repo Webhooks 에서 ping 실패 → 재발송 확인

작업 1 : null 프로바이더
- Local 에서 Git 코드 작업
# git clone
git clone https://github.com/gasida/t101-cicd && cd t101-cicd && tree

# feature branch 생성
git branch test && git checkout test && git branch

# main.tf 파일 작성
echo 'resource "null_resource" "example" {}' > main.tf

# add commit push
git add main.tf && git commit -m "add main.tf" && git push origin test
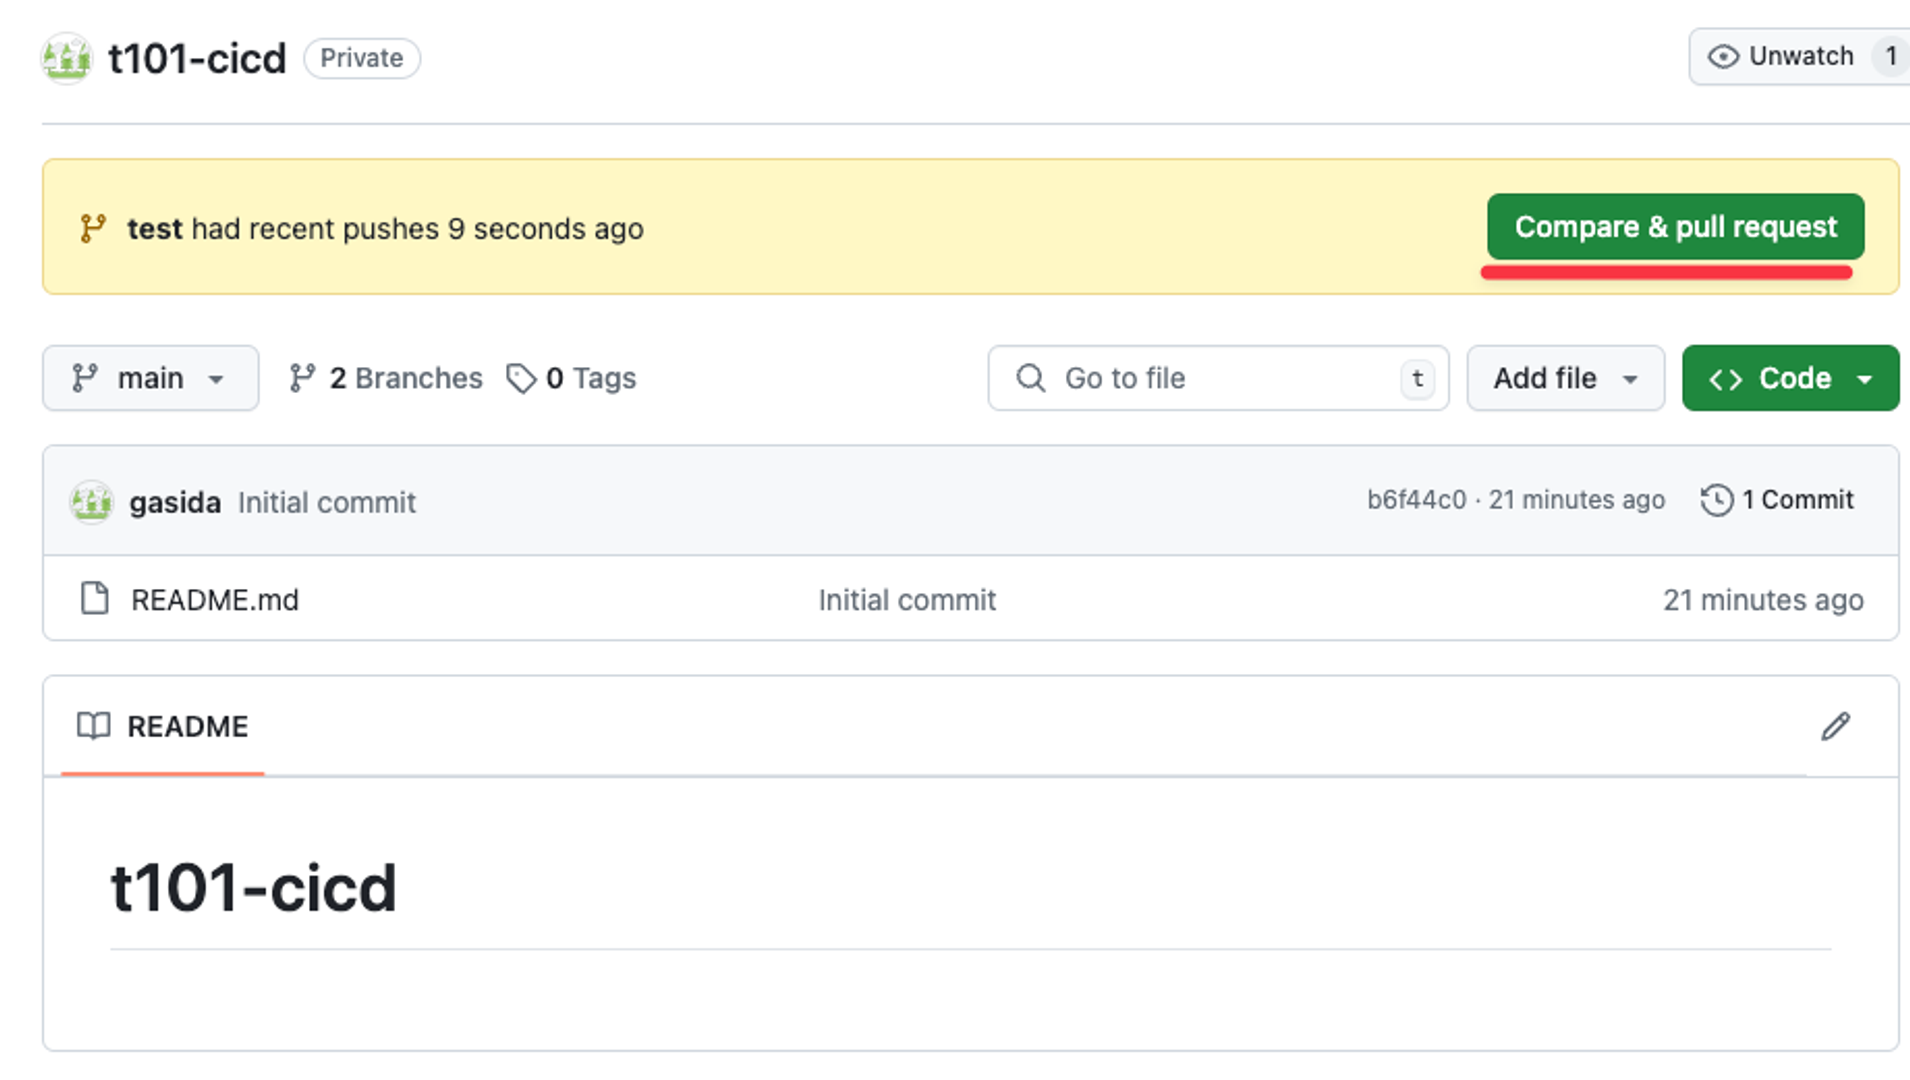
- Github(Create a pull request) → Atlantis 확인
- [신규 터미널] 서버 모니터링
watch -d tree .atlantis/ - Compare & pull request 클릭
- Create pull request : title ( create null resource )
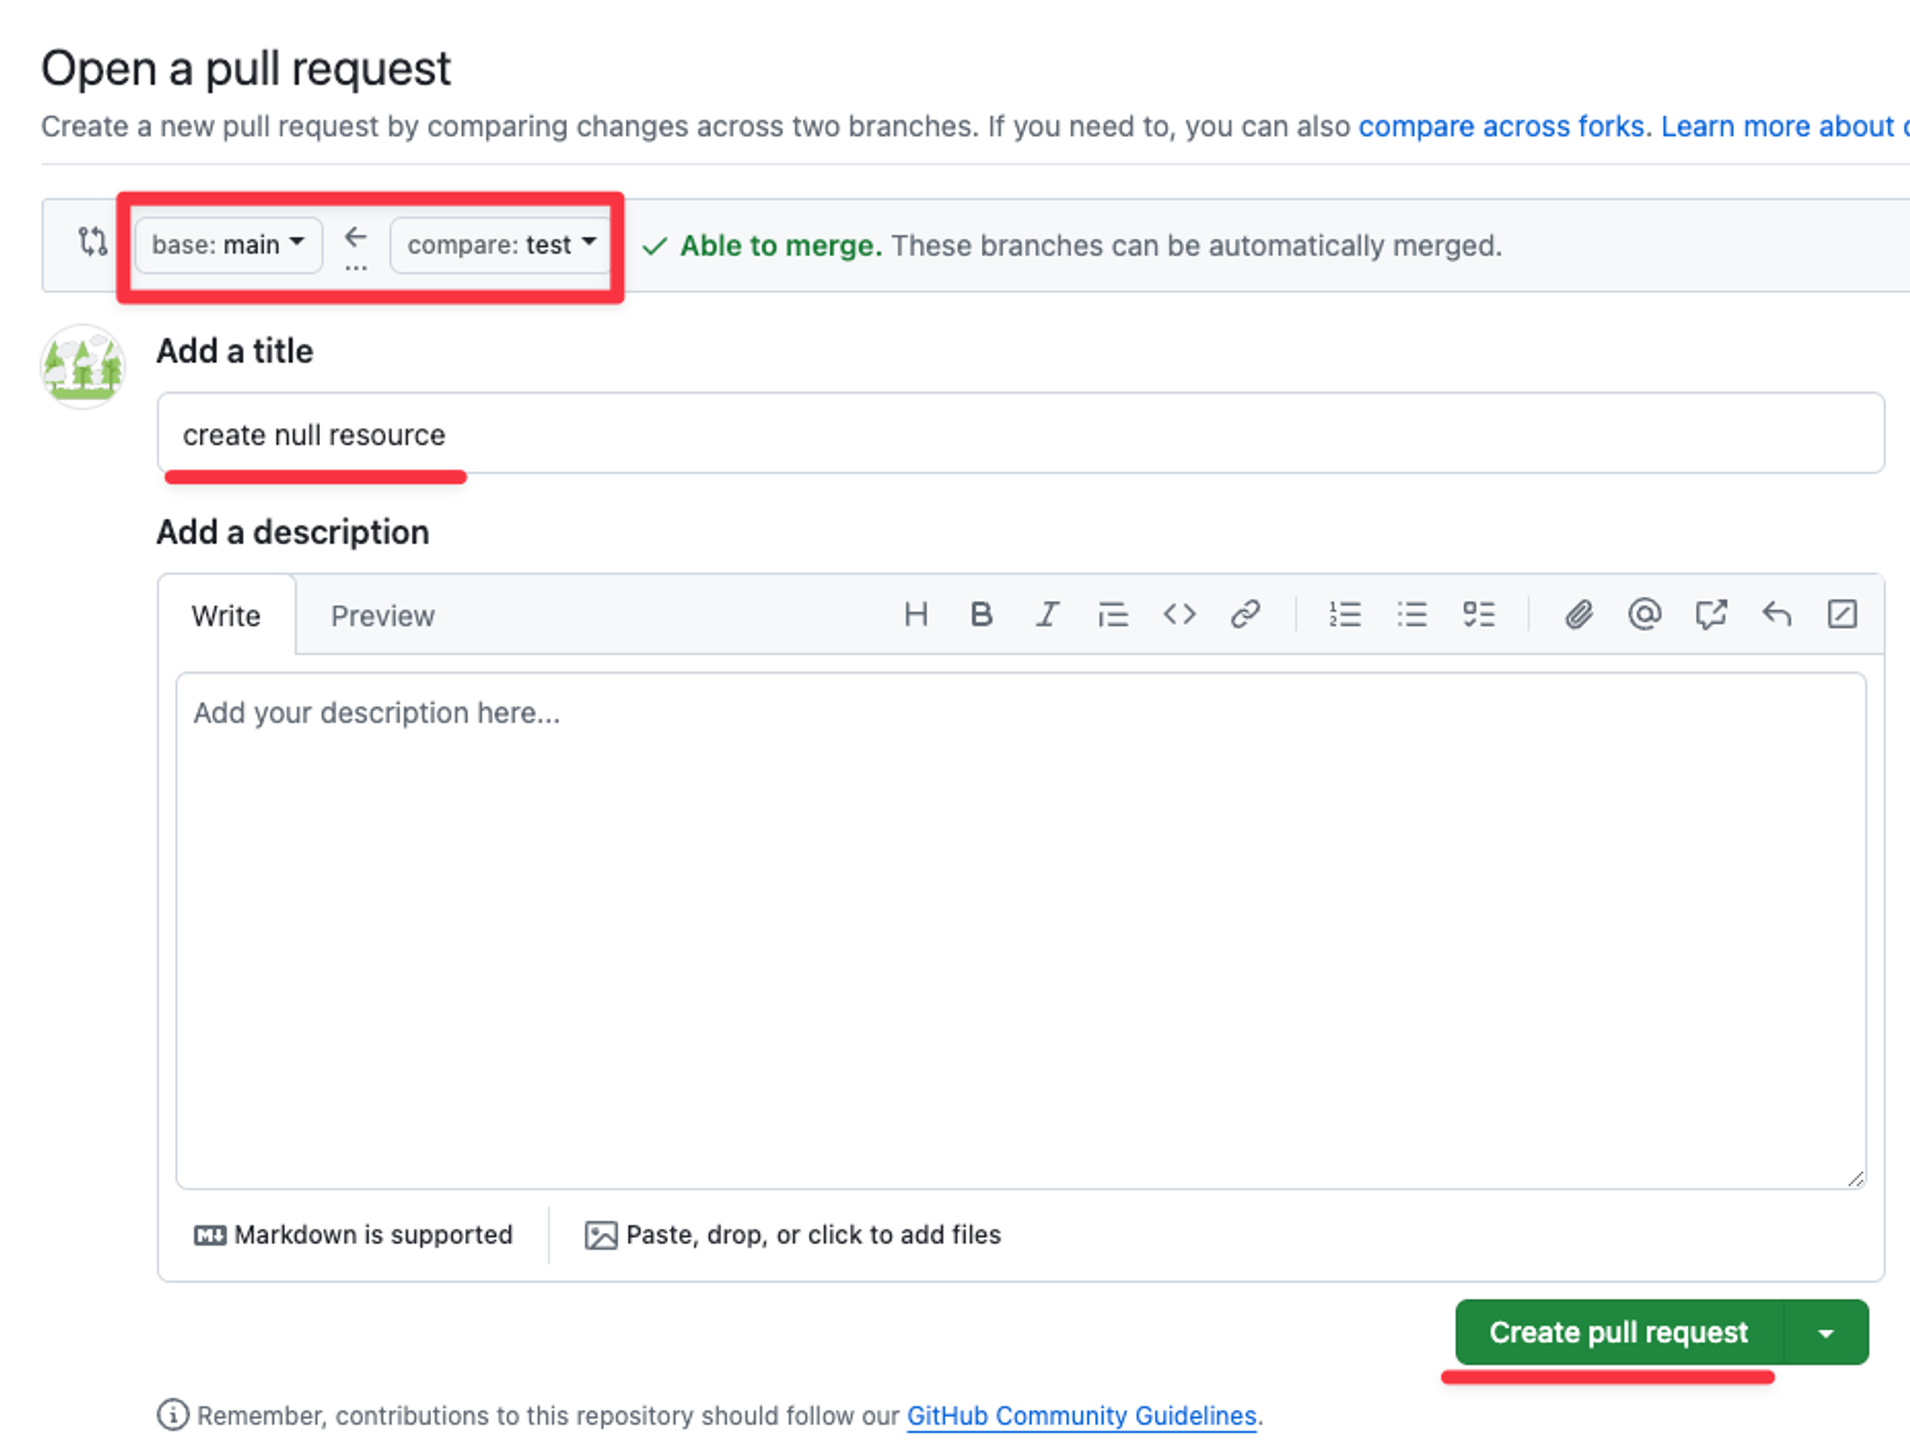
- Plan 자동 수행 확인 → 하단 plan Details 클릭 확인


- 서버 모니터링
# terraform plan 수행 결과 파일 확인
watch -d tree .atlantis/
.atlantis/
├── atlantis.db
├── bin
├── plugin-cache
│   └── registry.terraform.io
│       └── hashicorp
│           └── null
│               └── 3.2.2
│                   └── linux_amd64
│                       └── terraform-provider-null_v3.2.2_x5
└── repos
    └── gasida
        └── t101-cicd
            └── 1
                └── default
                    ├── README.md
                    ├── default.tfplan
                    └── main.tf

# Github Repo 코드를 가져 온 것을 확인
cat .atlantis/repos/$USERNAME/t101-cicd/1/default/main.tf
- 서버 실행 로그 확인
- Add a comment
#
atlantis help

#
cat /etc/passwd
Add a comment ⇒ apply 결과 화면 확인# atlantis apply -d . && cat /etc/passwd # atlantis plan -d . atlantis apply -d .
Merge pull request → Confirm merge# repos 에 1 디렉터리 삭제 watch -d tree .atlantis/ .atlantis/ ├── atlantis.db ├── bin ├── plugin-cache │ └── registry.terraform.io │ └── hashicorp │ └── null │ └── 3.2.2 │ └── linux_amd64 │ └── terraform-provider-null_v3.2.2_x5 └── repos └── gasida └── t101-cicd
웹 확인
Local Git# git checkout main ls git pull ls cat main.tf
- 서버 모니터링
- Atlantis : Autoplan, Manual Plan, Apply
Create a pull request so you can test Atlantis.
AutoplanAtlantis tries to figure out the directory to plan in based on the files modified.# [TIP] You could add a null resource as a test: resource "null_resource" "example" {} # Or just modify the whitespace in a file.
- You should see Atlantis logging about receiving the webhook and you should see the output of terraform plan on your repo
If you need to customize the directories that Atlantis runs in or the commands it runs if you're using workspaces or .tfvars files, see atlantis.yaml Reference.
- You should see Atlantis logging about receiving the webhook and you should see the output of terraform plan on your repo
- .Manual Plan
To manually plan in a specific directory or workspace, comment on the pull request using the -d or -w flags:atlantis plan -d mydir # 디렉터리 atlantis plan -w staging # 워크스페이스
Apply - If you'd like to apply, type a comment: atlantis apply. You can use the -d or -w flags to point Atlantis at a specific plan. Otherwise it tries to apply the plan for the root directory.
- [신규 터미널] 서버 모니터링
작업 2 : aws iam user 생성
- AWS S3 버킷 생성 : Terraform Backend State 저장용도
# aws s3 ls # aws s3 mb s3://<각자 유일한 S3 버킷명 이름> --region ap-northeast-2 aws s3 mb s3://gasida-t101 --region ap-northeast-2 # aws s3 ls - Local 에서 Git 코드 작업
# feature branch 생성 git branch iam && git checkout iam && git branch # 디렉터리 생성 mkdir iam && cd iam # main.tf 파일 작성 vi main.tf ---------- terraform { backend "s3" { bucket = "<각자 자신의 S3 버킷 이름>" key = "terraform.tfstate" region = "ap-northeast-2" } } resource "aws_iam_user" "myuser" { name = "t101user" } ---------- terraform { backend "s3" { bucket = "gasida-t101" key = "terraform.tfstate" region = "ap-northeast-2" } } resource "aws_iam_user" "myuser" { name = "t101user" } ---------- # add commit push git add main.tf && git commit -m "add main.tf" && git push origin iam
Github(Create a pull request) → Atlantis 확인- [신규 터미널] 서버 모니터링
watch -d tree .atlantisCreate pull request : title ( create iam user )
Compare & pull request 클릭
Plan 자동 수행 확인 → 하단 plan Details 클릭 확인- 서버 모니터링
# terraform plan 수행 결과 파일 확인 watch -d tree .atlantis/ .atlantis/ ... └── repos └── gasida └── t101-cicd └── 2 └── default ├── README.md ├── iam │ ├── default.tfplan │ └── main.tf └── main.tf # Github Repo 코드를 가져 온 것을 확인 cat .atlantis/repos/$USERNAME/t101-cicd/2/default/iam/main.tf - S3 버킷 확인
# aws s3 ls s3://$BUCKET
- 서버 모니터링
- Add a comment ⇒ apply 결과 화면 확인
# atlantis plan -d iam # 아래 명령??? atlantis destroy -d iam # atlantis apply -d iam
- aws s3 확인
aws s3 ls s3://gasida-t101 2024-07-07 18:23:47 862 terraform.tfstate - Merge pull request → Confirm merge
# repos 에 1 디렉터리 삭제 watch -d tree .atlantis/ .atlantis/ ├── atlantis.db ├── bin ├── plugin-cache │ └── registry.terraform.io │ └── hashicorp │ └── null │ └── 3.2.2 │ └── linux_amd64 │ └── terraform-provider-null_v3.2.2_x5 └── repos └── gasida └── t101-cicd - Local Git
# git checkout main git pull cd .. tree
- [신규 터미널] 서버 모니터링
작업 3 : 작업 2에서 생성한 리소스 삭제
- Local 에서 Git 코드 작업
# feature branch 생성 git branch deleteiam && git checkout deleteiam && git branch # 디렉터리 생성 mkdir deleteiam && cd deleteiam # main.tf 파일 작성 vi main.tf ---------- terraform { backend "s3" { bucket = "<각자 자신의 S3 버킷 이름>" key = "terraform.tfstate" region = "ap-northeast-2" } } ---------- terraform { backend "s3" { bucket = "gasida-t101" key = "terraform.tfstate" region = "ap-northeast-2" } } ---------- # add commit push git add main.tf && git commit -m "add main.tf" && git push origin deleteiam - Github(Create a pull request) → Atlantis 확인
- [신규 터미널] 서버 모니터링
watch -d tree .atlantisCreate pull request : title ( delete iam user )Compare & pull request 클릭
Plan 자동 수행 확인 → 하단 plan Details 클릭 확인- 서버 모니터링
# terraform plan 수행 결과 파일 확인 watch -d tree .atlantis/ # Github Repo 코드를 가져 온 것을 확인 cat .atlantis/repos/$USERNAME/t101-cicd/3/default/deleteiam/main.tf
- 서버 모니터링
- Add a comment ⇒ apply 결과 화면 확인
atlantis apply -d deleteiam - AWS 관리 콘솔에서 IAM User 삭제 확인
- aws s3 확인
aws s3 ls s3://gasida-t101 2024-07-07 18:23:47 862 terraform.tfstate - Merge pull request → Confirm merge
# repos 에 디렉터리 삭제 watch -d tree .atlantis/ - Local Git
#
git checkout main && git pull && cd .. && tree
- [신규 터미널] 서버 모니터링
실습 자원 삭제
- CMD 작업
aws cloudformation delete-stack --stack-name t101 aws s3 rm s3://gasida-t101 --recursive aws s3 rb s3://gasida-t101 - GitHub Repo 삭제
- Repo → Settings → Delete this repository
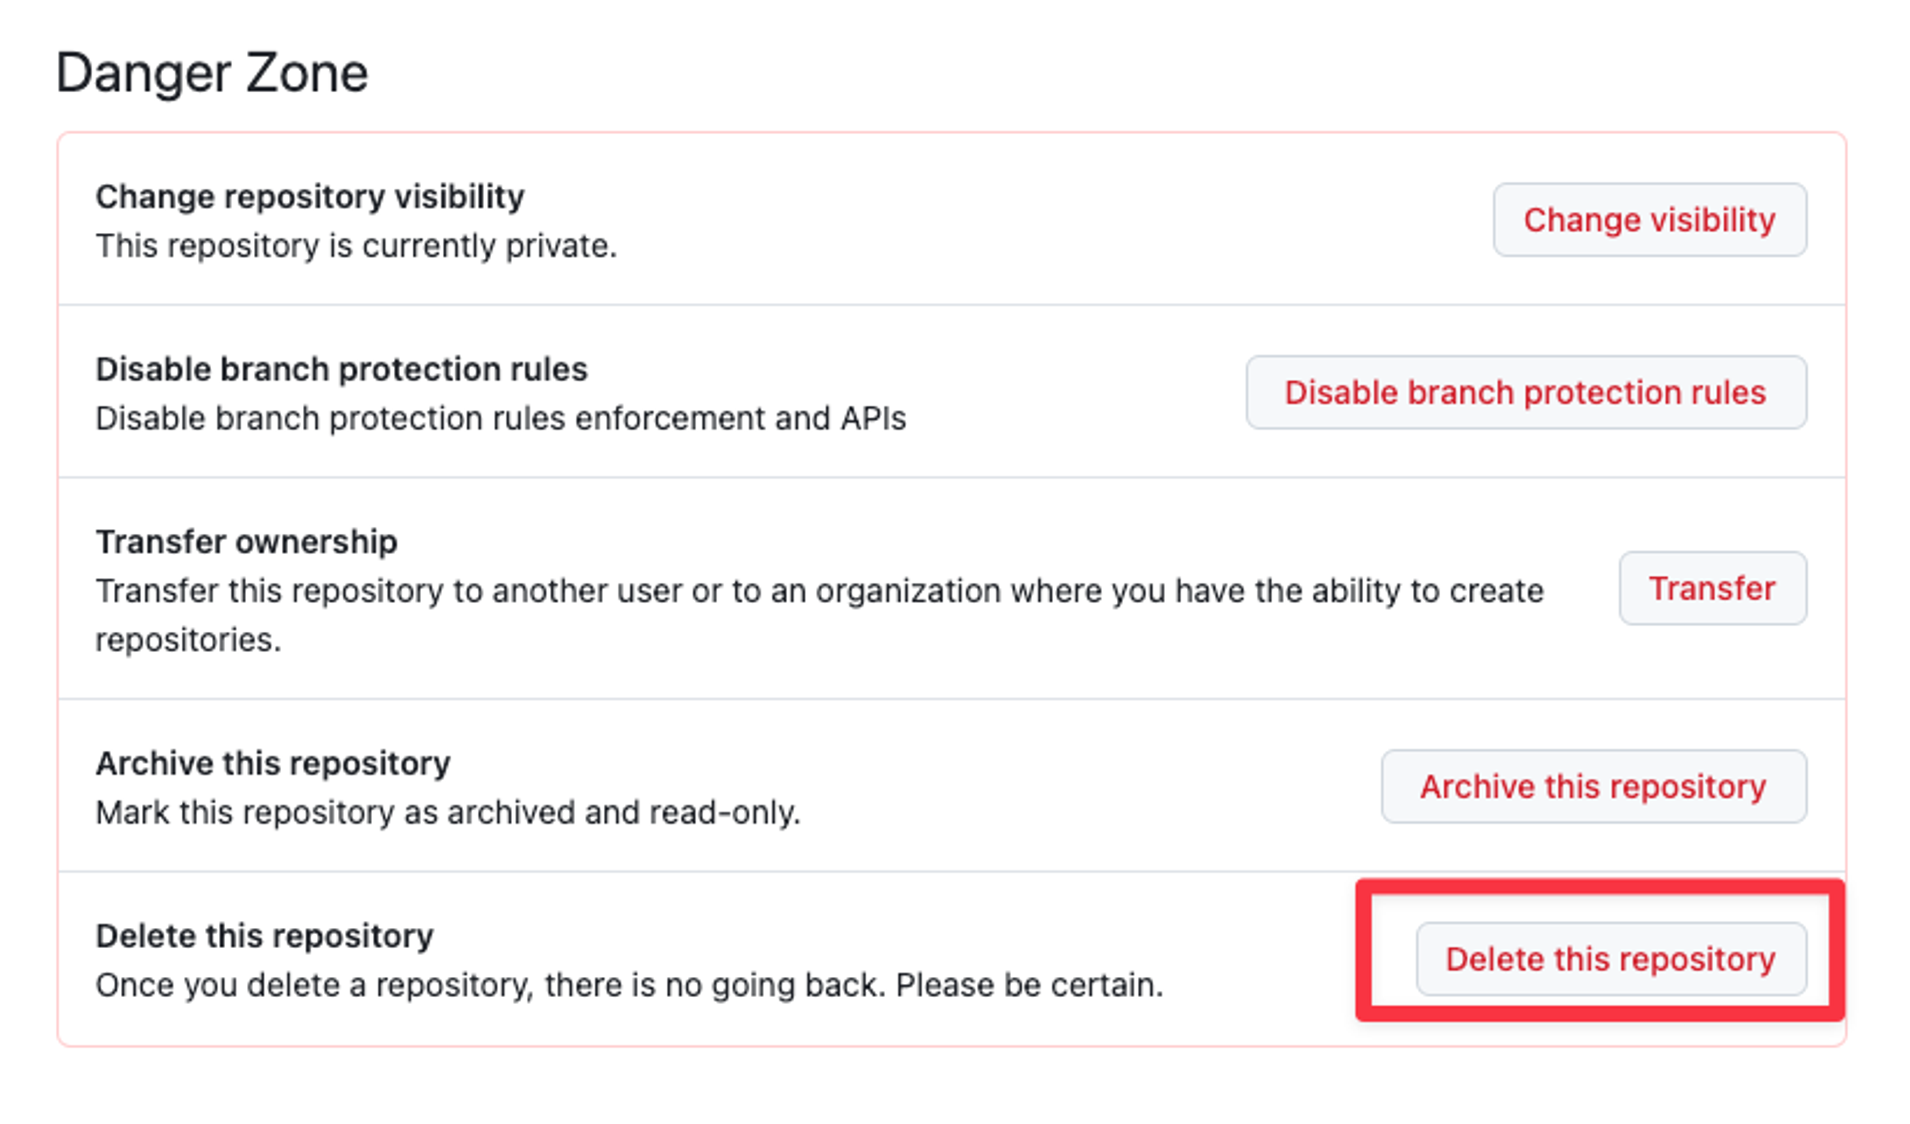
- Repo → Settings → Delete this repository
- Github Token 삭제
- 로컬 GitHub 코드 삭제